CLICK HERE FOR FREE BLOGGER TEMPLATES, LINK BUTTONS AND MORE! »

Tutorials

Wednesday, February 29, 2012

Key to my [Fashionable] Heart take two...

Hello..

What did you think of my last post? Cute card...but not much detail..huh! =)
I'm back today with all the deets......

During the month of February i cut out lots and lots of hearts from the Fashionable Hearts sizzlet (love this little sizzlet!)...Since i had such a variety of sizes and colors i thought i'd play around a bit. I thought it would be a nice touch to add some hearts to this particular DSP! They fit niceyly into the decorative printed circles. Take a look again at the first card i posted. And now take a look at this card:

Do you see a difference between the two cards? Not much difference...the layout is the same but i switched up the size of the hearts on the DSP!

Using a variety of colours i chose to use the smallest heart on the sizzlet for this first card. I used the embossed houndstooth heart and added a short greeting banner. The key is also facing up. AND yes i cut out the DSP to shape the zig zag!...i hear gasps...! Trust me, it didn't take long at all and cutting is part of paper crafting.....right..? ; )


This card has bigger hearts on the DSP. I used the second smallest hearts from the sizzlet and attached them to the DSP. I also cut out a cherry cobbler heart using the full heart punch and backed it onto a crumb cake heart from the framelits die.

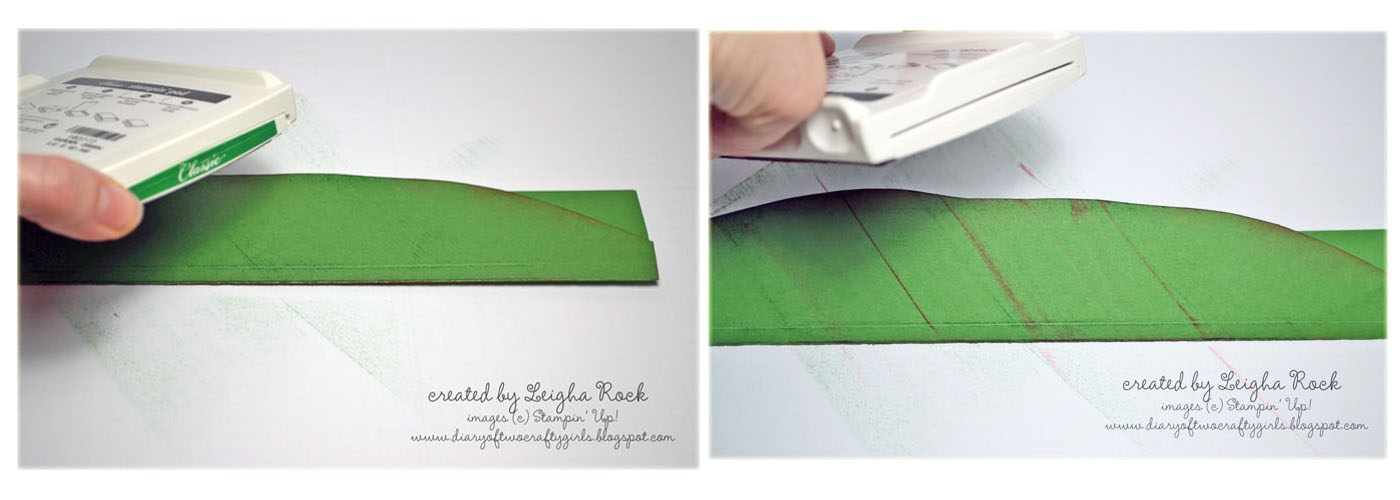
I fancied up the arrow greeting banner with a bit of bling. This banner was cut out using the full heart punch. Here's how i did it:

First stamp the greeting on a piece of scrap whisper white card stock. My piece of card stock is 1/2" wide x 3" long. Slide the left end into the full heart punch as shown. This will create a "fork".

Then slide the right end of the greeting card stock into opposite end of the full heart punch as shown here. This creates the point of your "arrow".

Just before you attach your greeting banner to the cherry cobbler heart add some bling! I've raised up the crumb cake heart with stampin' dimensionals.


Hope you like... : )

Products used for this project:

Stamp Sets: Artistic Ethchings (W118517, C120573), You’re a Gem (W122268,122270)

Card Stock: Crumb Cake (120953), Whisper White (100730), Blushing Bride (119796), Baja Breeze (111352), Cherry Cobbler (119685), Peach Parfait (119794), Pear Pizzazz (119795), Rose Red (102544)

Ink: Basic Black (101179)

Accessories and More: Big Shot (113439), Fashionable Hearts Embosslit Die (125596), Hearts Collection Framelits Dies (125599), Twitterpated DSP (125406), Full Heart Punch (119883), Linen Thread (104199), Basic Rhinestones (119246), Paper Snips (103579), Stampin’ Dimensionals (104430), Multipurpose Liquid Glue (110755), Snail Adhesive (104332)


Monday, February 27, 2012

Key to my [Fashionable] Heart...


Products used for this project:

Stamp Sets: Artistic Ethchings (W118517, C120573), You’re a Gem (W122268,122270)

Card Stock: Crumb Cake (120953), Whisper White (100730), Blushing Bride (119796), Baja Breeze (111352), Cherry Cobbler (119685), Peach Parfait (119794), Pear Pizzazz (119795), Rose Red (102544)

Ink: Basic Black (101179)

Accessories and More: Big Shot (113439), Fashionable Hearts Embosslit Die (125596), Twitterpated DSP (125406), Full Heart Punch (119883), Linen Thread (104199), Paper Snips (103579), Stampin’ Dimensionals (104430), Multipurpose Liquid Glue (110755), Snail Adhesive (104332)

--Don't forget if you order $60 (before shipping and taxes) or more through me between January 24th and February 29th 2012, not only will you receive a Fabulous FREE Sale-A-Bration product but you will also receive a Fabulous FREE card tutorial from me!! ; )

Here is a Testimonial from one of my customers:

Hi Natasha
What a great idea! I love all the cards in this tutorial and it is a great way to showcase SAB. These will also be really easy to adapt for other products. Thanks for sharing!

TO ORDER STAMPIN' UP! PRODUCTS ON-LINE 24/7, CLICK HERE

or click here to email me your order!

Friday, February 24, 2012

St. Patrick's Day Shamrocks


Well, Valentine's Day is behind us, and it's time to start focusing on the next holiday:  St. Patrick's Day!  This card would be quite versatile -- who can't use a couple of "good luck" cards in their stash?  I saw a card last year, and copied a pic of it into my ideas folder last year.  I loved the card, and used it as the inspiration for this shamrock card.  The picture wasn't watermarked, and I can't remember where it is from.  If you recognize elements of your design, email me, and I'd be happy to give you credit and a link :)  This is my take on the card:


Products used for this project:

Stamp Sets: So Happy for You (retired)

Card Stock: Basic Black, Whisper White, various DSP in So Saffron, Certainly Celery, and Old Olive

Ink: Early Espresso

Accessories and More:  Heart to Heart Punch , Corner Rounder Punch, Color Spritzer Tool, Sponges, Cutter Kit, Dimensionals, Sewing Machine.


Wednesday, February 22, 2012

Thank you for your order...


I hope you're enjoying your Sale-a-bration products! I sure am! I just love the Everyday Enchantment SAB DSP! and for the first time in my SU history I've used every single sheet in ONE pack of DSP and have more on the way...woohoo! I'm finding this gorgeous DSP easy to work with and love incorporating this product into many of my projects!

My stamp club members were looking for a quick and easy card that they could mass produce and have on hand when they needed a card for any occasion. So this month at club get together i shared this cute butterfly card with them! The ladies LOVED how quick and easy this card was to create and so did i...to prove how simple it was to create and mass produce I made a whole schwack of them as thank yous for my online customers this month! Not only did they receive a FREE card tutorial with their SAB orders this month but i sent thank you cards in the mail! I hope you ladies enjoyed your little surprise.... : )

If you'd love some inspiration to get your craft mojo going and would love a FREE card tutorial see details below to learn how to earn your FREE tutorial! Don't delay...this card tutorial is only being offered until February 29th!! : )


It's hard to see in the first photo, I used the Stripes Textured Impressions Embossing Folder being offered as a SAB product for some textured background! Since i used a light coloured piece of card stock I had to angle the photo in order to get a good shot of the stripes!

Hope you like... : )

Products used for this project:

Stamp Sets: Short & Sweet (115060)

Card Stock: Crumb Cake (120953), Very Vanilla (101650), Old Olive (100702),
Pool Party (122924 OR 127713 if ordering as a SAB Product- you will receive 4 sheets each of all 5 in colours)

Ink: Early Espresso (119670)

Accessories and More: Big Shot (113439), Stripes Textured Impression Embossing Folder (123128 OR 127710 if ordering as a SAB product), Beautiful Wings Embosslit Die (118138), Everyday Enchantment DSP (126154 - Exclusive SAB Product), 1-3/8" Circle Punch (119860), 1-1/4" Circle Punch (119861), Basic Rhinestones (119246), Stampin Dimensionals (104430), Mini Glue Dots (103683), Snail adhesive (104332)

--Don't forget if you order $60 (before shipping and taxes) or more through me between January 24th and February 29th 2012, not only will you receive a Fabulous FREE Sale-A-Bration product but you will also receive a Fabulous FREE card tutorial from me!! ; )

Here is a Testimonial from one of my customers:

Hi Natasha
What a great idea! I love all the cards in this tutorial and it is a great way to showcase SAB. These will also be really easy to adapt for other products. Thanks for sharing!

TO ORDER STAMPIN' UP! PRODUCTS ON-LINE 24/7, CLICK HERE

or click here to email me your order!

Saturday, February 18, 2012

All Occasions Card


Products used for this project:

Stamp Sets: A Word to You

Card Stock: Baja Breeze, Cherry Cobbler, Very Vanilla, Watercolor Paper, First Edition Specialty DSP

Ink: Basic Black, Soft Suede, Old Olive

Accessories and More: Designer Frames Embossing Folder, Scallop Edge Border Punch, 1/16" Circle Handheld Punch, Itty Bitty Shapes Punch Punch Pack, Pearls Jewels, Linen Thread, Sponges, Color Spritzer Tool and Dimensionals.

Thursday, February 16, 2012

Teacher(s) Valentine's Day Treats


I saw a similar cute pocket die project in our Januray Stampin' Success and thought it was way to cute so off i went to re-create!! Here's what i came up with and what we created at January's Stamp Club get together!


Since the project received rave reviews from my stamp club ladies (who doesn't love to make cute projects that hold yummy treats!??) i decided to make some up for the kid's teacher's this year for Valentine's Day! I hope the teachers enjoyed their little treats from the kids! They were excited to give them out. (Well Ethan was a bit shy but Alyssa was super excited!!)

Hope you like... : )

Products used for this project:

Stamp Sets: Dot, Dot, Dot (115707) , Sprinkled Expressions (Exclusive 2012 SAB set pg. 8)

Card Stock: Whisper White (100730), Cherry Cobbler (119685), Pink Pirouette (111351)

Ink: Cherry Cobbler (119669)

Accessories and More: Big Shot (113439), Heart Collection Framelits (125599), Petite Pocket Die (123131), 1-1/4” Circle Punch (119861), 1-3/8” Circle Punch (119860), Early Espresso or Cherry Cobbler Bakers Twine, Sticky Strip (104294), 3”x5” cello bag (103104), Stampin’ Dimensionals (104430), Snail adhesive (104332)

--Don't forget if you order $60 (before shipping and taxes) or more through me between January 24th and February 29th 2012, not only will you receive a Fabulous FREE Sale-A-Bration product but you will also receive a Fabulous FREE card tutorial from me!! ; )

Here is a Testimonial from one of my customers:

Hi Natasha
What a great idea! I love all the cards in this tutorial and it is a great way to showcase SAB. These will also be really easy to adapt for other products. Thanks for sharing!

TO ORDER STAMPIN' UP! PRODUCTS ON-LINE 24/7, CLICK HERE

or click here to email me your order!


Tuesday, February 14, 2012

Happy Valentine's Day Teacher


Here's the card i created for Ethan's Teacher(s). They had to be very simple. ---NOTHING WITH HEARTS OR ANYTHING TO DO WITH LOVE ON THEM!-- yup he's in grade two and at this stage of his life he runs away from any girl that tries to utter a hello to him.

When i told him it was time to write out his Valentine cards for his class he asked if i was making cards for his teachers? (3 female teachers) I said of course..! I could feel a rush of anxiety run through his body and could see his mind racing with thoughts of i have to give something to my teacher with hearts on it!? --oh gaaawaad!... So of course i had to tease and say "and I'm going to glue lots and lots of hearts on each card.....bwaaaahaa". He said ...COME ON MOM!! After he settle down i said how about i make something simple? Hummmmm...something without hearts...wow ..what kinda Valentine's day card doesn't have hearts on it..? Then i remembered seeing a card on the front cover of a craft magazine a couple months ago. It had a chalkboard on it and it said U + Me = Chemistry! So off i went to create. I was pushing it a bit by stamping "Be My Valentine" but he agreed to the greeting (yay!). He sat down to write out his teacher's names on the front of each card. It was perrrrrrrfect.. very simple and not to many words or hearts!! (i did place a super small red heart inside the white heart but it got nixed upon final review...darn!)

My test version of the card was originally created with the chalkboard decor elements and Ethan wrote out his teacher's name with chalk and it turned out great but i decided to create the cards with black card stock and a white crayon! I was worried the chalk might rub off...hum...either by HIM or when it was slipped in and out of the envelope as i had a treat to add to the envelope. : )


All n' all Ethan thought it was pretty cool. He thought the tiny apple and chalk on the ledge was awesome. He asked if i could add a chalkboard eraser!? I said only if i can add a small red heart! lol. (we know that wasn't going to happen!)

I hope you all have a fabulous day with your loved ones and enjoy your sweet treats!

Products used for this project:

Stamp Sets: Delightful Dozen (W122650,C122652)

Card Stock: Basic Black (121045), Whisper White (100730), Cherry Cobbler (119685) Early Espresso (119686), Lucky Limeade (122926)

Ink: Craft Whisper White (101731)

Accessories and More: 1/2" Circle Punch (119869), 3/16" Corner Punch (119871), Stampin' Dimensionals (104430), Snail adhesive (104332), White Crayon

--Don't forget if you order $60 (before shipping and taxes) or more through me between January 24th and February 29th 2012, not only will you receive a Fabulous FREE Sale-A-Bration product but you will also receive a Fabulous FREE card tutorial from me!! ; )

Here is a Testimonial from one of my customers:

Hi Natasha
What a great idea! I love all the cards in this tutorial and it is a great way to showcase SAB. These will also be really easy to adapt for other products. Thanks for sharing!

TO ORDER STAMPIN' UP! PRODUCTS ON-LINE 24/7, CLICK HERE

or click here to email me your order!


Monday, February 13, 2012

Happy Valentine's Day from Alyssa! {Tutorial}

Today Alyssa is having her Valentine's Day party at her pre-school and she just couldn't wait to give out her Valentine's treats to everyone! All weekend she kept asking if it was Valentine's day yet!!

I always love to hear my good friend, Meredith's crafting ideas for any special occasion because she's so creative and enjoys making craft projects for her daughter's class. When i asked her what her thoughts were for Valentine's day she mentioned melting crayons into heart shapes? --WHAT? i said really? She sent me a few links and then i was off to round up all the broken crayons we had lying around and then headed out to look for heart shaped baking pans!!

The kids were really excited to help out so here's a quick tutorial on how we did it!

1.Heat the oven to 250°.

2. Crayola Crayons work the best. Peel all the paper off the crayons. (Soak in warm water if they are hard to peel) To speed up the peeling process have the kids help out! : )


3. Fill each mold with crayon pieces. (I used a regular metal baking pan and some silicon molds. I preferred the shapes in the metal baking pan over the silicone molds but the kids wanted to use both so we did)


Don't over fill like Alyssa is doing..! That's a no no.. ; )
How could i tell her to stop...look how focused she is! Doing such a great job peeling and filling! The kids had fun choosing which colors they wanted to mix up!--the boys had fun breaking the crayons and making a mess all over the counter and floor with the crayon wrappers.... ohhhhhhhh boys.. ; )


Now Alyssa can't decide where the green and orange crayons are going to go? In the empty heart mold in the corner or can she fit them on top of her huge pile? hum....only her little mind knows what she will do next... : )


She decides to put the green one in the corner and even out the rest! --She says it's ready to go in the oven! (don't worry when she's not looking mom evens them out a wee bit more..!)


4. Bake until the crayons melt, about 10 to 15 minutes. Tip: Place a baking pan under the silicone molds as they may not be as sturdy. The baking pan will catch any drips.

5. Once they are completely cool, remove the crayon hearts from the baking pan/molds and smooth any rough edges on the bottom by rubbing them on a piece of scrap paper.


6. Cut out 3-1/2" white card stock circles using your Big Shot and add your message.

Suggested messages:
You color my world
Valentine, you make my heart melt
Have a happy Valentine's Day, for "crayon" out loud!

7. Use Stampin' Dimensionals to stick each crayon heart to the 3-1/2" white card stock circle -- or use this template depending on the size of your hearts.


Thanks Meredith for the fantastic idea!! The kids and i had so much fun making these and we hope Alyssa's little friends have have fun coloring with them!

Products used for this project:

Card Stock: Whisper White (100730)

Stampin Write Markers: Basic Black (100082), Real Red (100052)

Accessories and More: Big Shot (113439), 3-1/2" Circle Die (121811), Stampin' Dimensionals (104430), Crayola Crayons, Heart Shaped Baking Pan.


TO ORDER STAMPIN' UP! PRODUCTS ON-LINE 24/7, CLICK HERE

or click here to email me your order!


Sunday, February 12, 2012

A Dozen {Cardstock} Roses for My Valentine


My husband is an artist.  Fortunately for me, no one would appreciate a dozen handmade roses more than him.  I'm so lucky to have such a talented and supportive guy who encourages me to be creative!  So with this in mind, I created him a dozen Valentine roses. 

I made the roses based on my Long Stemmed Rose Tutorial tutorial.  Thanks to all my customers who bought this tutorial and made it so successful!  I am always trying to show my customers how versatile these tutorials are.  For all of you who bought the Long Stemmed Rose Tutorial, here is another way to use it.


Cut Garden Green card stock into two 4" x 11" pieces and two 1-1/2" x 11" pieces.  Score the 3" x 11" pieces down the centre.  Cut a rough organic shape along one edge of the two larger pieces.  Fold down the score of the two larger pieces.  Sponge down the fold and along the edges of all four pieces with Real Red ink.  You may need to adjust the height of these pieces to fit the dimension of your glass container.  I used a vase which is 4.5" (h) x 8"(l) x 2.5"(w).


Turn the two larger pieces over, place them onto the foam mat from the Mat Pack,  and using your bone folder make light scores to represent veins along the two larger pieces.  Then rub your bone folder lightly along the leaf in a couple of  areas to give the leaf just a little shape and slight dimension, so it is not so flat. 

Fold the larger two pices in half.  Drag a Garden Green ink pad in a diagonal pattern along each side of the piece.  Then using the corner of a Read Red ink pad, "draw" a few bold veins in a diagonal pattern along each side of the leaf.  


Glue each of the small pieces to the large piece so that the entire inside surface of your glass vase will be covered as shown above.  One of the sets will wrap around the front and sides, and the other will wrap around the back and sides.  Place floral foam, cut to fit,  inside the vase. (Optional - not shown:  glue down some dried moss onto of the foam).


Make one dozen roses from the Long Stemmed Rose Tutorial out of Real Red cardstock.   The roses in the tutorial are full blown roses with multiple layers.  To make these roses, which are smaller, and resemble tighter roses just leaving the bud stage, simply make the roses as per the tutorial but only with 5 layers instead of the usual number in the tutorial.   Remember to give the petals in the last row a little variation so that all the roses do not look exactly the same.   Cut the stems to 3".   Push the dozen roses down into the floral foam.  


Now you can replicate this gorgeous arrangement for your Valentine!  Wouldn't it also make a stunning wedding centerpiece?  Ohhhh! I can think of tons of ways to use this tutorial! :)

Friday, February 10, 2012

Embossed Heart from Framelits Die


I'm in love with the new framelits SU has just come out with--oh, have i already mentioned that before...!?! ; )

For this card i used the Hearts Collection framelits for the dry embossed heart. Instead of the die cutting out a heart shape i reversed the die so it embossed the image instead! Pretty cool...huh!? i had seen it done a while ago and finally had a chance to try it out!

Give it a try, here's how:

Set your big shot Multipurpose platform to Tab 2 and add the following:
-Standard Crease Pad
-The card stock you are embossing
-Framelit with cutting edge facing upward (make sure it's facing UPWARD! if you place the cutting edge down it will cut through your card stock and maybe your crease pad...eeeks..)
-Standard cutting pad
-Shim or extra piece of card stock if needed! I didn't use one but if you want/need a deeper impression then this will help.


I used one of the scallops from the scallop trim border punch to create the little love greeting banner. Then again forked it with the Full Heart punch. I cut out a couple little hearts from the new fashionable hearts embossing die and attached them to the linen thread with a rolled up a glue dot.

Hope you like... : )

Products used for this project:

Stamp Sets: Tiny Tags (W118091,C118592)

Card Stock: Very Vanilla (101650), Cherry Cobbler (119685) Early Espresso (119686)

Ink: Early Espresso (119670)

Accessories and More: Big Shot (113439), Heart Collection Framelits (125599), Fashionable Hearts Embosslit Die (125596), 3/8" Blushing Bride Pleated Satin Ribbon (125570), Scallop Trim Border Punch (118402), Full Heart Punch (119883), Basic Pearls (119247), Linen Thread (104199), Cutter Kit (106958-distresser), Sticky Strip (104294), Mini Glue Dots (103683), Snail adhesive (104332)

--Don't forget if you order $60 (before shipping and taxes) or more through me between January 24th and February 29th 2012, not only will you receive a Fabulous FREE Sale-A-Bration product but you will also receive a Fabulous FREE card tutorial from me!! ; )

Here is a Testimonial from one of my customers:

Hi Natasha
What a great idea! I love all the cards in this tutorial and it is a great way to showcase SAB. These will also be really easy to adapt for other products. Thanks for sharing!

TO ORDER STAMPIN' UP! PRODUCTS ON-LINE 24/7, CLICK HERE

or click here to email me your order!


Wednesday, February 8, 2012

Clean and Simple Valentine's Day Cards


This is a very clean and simple card! Are you lovin' the new framelits dies? Once again i've used the Hearts Collection framelits dies for this card. ohhhh how i'm lovin' them... ; ) : )


To fork the ends of my greeting banner i once again used my Full Heart Punch. I really love how simple this little trick is! Sometimes it takes a few tries when using your paper snips to get the right look for your banner but i find if i use the heart punch or a square punch it's quick and easy.. ; )

Since these cards were so simple to create i made several of them with different greetings and switched up the colours a bit..! Hope you like... : )


Products used for this project:

Stamp Sets: En Francais Background (109521), Messages for Mom (W117016,C118580) or Something to Celebrate (retired)

Card Stock: Baja Breeze (111352), Whisper White (100730), Cherry Cobbler (119685), or Blushing Bride (119796)

Ink: Basic Black (101179)

Accessories and More: Big Shot (113439), Hearts Collection Framelits Die (125599), Basic Rhinestones (119246), Full Heart Punch (119883), Cutter Kit (106958-Distresser), Stampin Dimensionals (104430), Snail adhesive (104332)

--Don't forget if you order $60 (before shipping and taxes) or more through me between January 24th and February 29th 2012, not only will you receive a Fabulous FREE Sale-A-Bration product but you will also receive a Fabulous FREE card tutorial from me!! ; )

Here is a Testimonial from one of my customers:

Hi Natasha
What a great idea! I love all the cards in this tutorial and it is a great way to showcase SAB. These will also be really easy to adapt for other products. Thanks for sharing!

TO ORDER STAMPIN' UP! PRODUCTS ON-LINE 24/7, CLICK HERE

or click here to email me your order!