CLICK HERE FOR FREE BLOGGER TEMPLATES, LINK BUTTONS AND MORE! »

Tutorials

Showing posts with label Teeny Tiny Wishes. Show all posts

Tuesday, July 10, 2012

Teacher's Apple Card and Cupcakes....


Oh dear, where do i begin?  WHERE HAVE I BEEN, you ask?  ; )
... or should i start with a simple Hello.. : )

I can't believe school is out.. here are my sweet darlin's on their first day of school back in September.  Alyssa was so excited to go to school with her big brother....In the next few posts i'll share some current photos.  I can't believe how much Ethan has "grown" up since then... 


June was a super busy month.  The kids kept me busy with their year end school activities along with all their other activities wrapping up; dance recital, hockey playoffs and baseball practices and games. Ethan's class had about 5 field trips in ONE month...they went to the zoo, they had a day at the beach, spent an afternoon at the water park and another afternoon at the swimming pool.  They had a gorgeous sunny day for sports day. And to keep us hopping we spent everyday of the last 3 weeks of june at the ball park.  Ethan tried out for and made the All Star team for baseball.  --proud mommy smile : ).  So the team practiced for two weeks straight and then played in a 5 day tournament.  Will share more deets and photos with the coaches cards i created in posts to come.

So that left very little time for crafting.  The crafting i did do was stamping on the fly!  I created teacher cards, baseball coaches, dance teacher thank yous and hockey treats but sadly i didn't have much time to write and share with you all at the time everything was going on. My computer time was very limited... i don't think i turned on my computer until yesterday!  I can't say i was home enough to sit down and enjoy a quiet moment. 

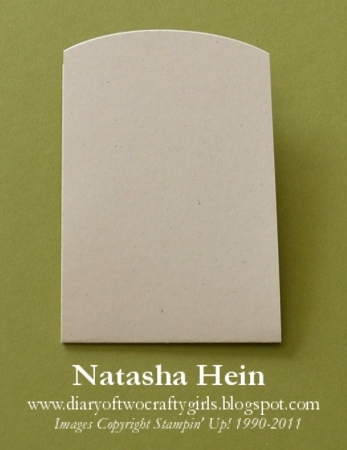
This is a card i created for Ethan's teacher. Since i had very limited time to craft i created something quick but of course cute.


I used the Fashionable Heart Emboslit, turning the heart into a cute little apple. I used the paper snips to shape the bottom of the heart and added a stem and leaf at the top.  I used half of the smallest heart on the Emboslit to create the leaf.


I had Ethan write a little note on what he "liked" about school this year.  I was shocked he wrote that he enjoyed math and science!  Every time i picked him up from school i asked how school was and he'd say "i hate school..it's boring"... so phewwwwwwww glad he didn't write that.. : )

(if you click on the photo you can get a better view of what he wrote)


For Teacher's appreciation day i made these darlin apple cupcakes!  They turned out great!  The teacher's said they were to cute to eat but that didn't stop them from digging in.. : )


I stumbled across the idea and recipe here and couldn't wait to make them. 
Enjoy!-- they would make a great back to school treat for the teachers. ; )


Hope you like  : )

Products used for this project:

Stamp Sets: Teeny Tiny Wishes, Confetti, School Lines

Card Stock: Crumb Cake, Real Red, Old Olive, Whisper White, Early Espresso

Ink: Basic Black

Accessories and More: Big Shot, Stripes Embossing Folder, Fashionable Heart's Embosslit, Itty Bitty Framelits, Decorative Label Punch, Distressing Tool, Paper Snips, Stampin' Dimensionals, Snail Adhesive


Sunday, June 3, 2012

Artistic Etchings Masculine Cards...


I CASEd this card from my upline a while ago.  I love how masculine looking it is!!  I never have enough "guy" cards on hand so i made sure i created a handful of them to have on hand.  The greetings i chose were sympathy, birthday and a thank you but I'm sure this would make a GREAT Father's day card as well. :) 

To give the cards a bit of a vintage look I dragged the corner of the crumb cake ink pad directly onto the first edition DSP and very vanilla card stock.  I also distressed the edges of the very vanilla card stock with a distressing tool and espresso ink.  On the sympathy cards i switched the DSP, baja breeze card stock and ribbon to the right hand side of the card.  The "sympathy" greeting was a bit long for the jewelry tag punch so i just extended the card stock a bit to make it fit.

Hope you like.. : )

Supplies used for this Project:

Stamp Sets: Artistic Etchings, Teeny Tiny Wishes

Card Stock:  Early Espresso, Crumb Cake, Very Vanilla, Baja Breeze 

Ink: Crumb Cake, Early Espresso

Accessories and More:  First Edition Specialty DSP, Jewelry Tag Punch, Vintage Trinkets, 3/8" Crumb Cake Taffeta Ribbon, Snail Adhesive, Stampin Dimensionals, Distressing Tool.


Friday, May 4, 2012

Flower Pot Gift Idea {Tutorial}


For stamp club this month we created this cute little gift!.. This little flower pot holds a flower bulb in it so whomever receives this special gift will be able to plant it and watch it grow.. : )

This would be a great gift idea for Mother's day or for a year end teacher's gift.--I'm sure anyone who loves to garden would adore this gift idea as well!!  This project uses very minimal supplies which makes it very simple and of course fun to create.

Supplies needed to create project:

Stamp Sets: Fabulous Florets (W123025,C123027), Teeny Tiny Wishes (115370)

Card Stock:  Naturals Ivory (101849)- 3-1/2" x 11, scored at 5-1/2", Scraps for Flowers

Ink: Early Espresso (119670),  Daffodil Delight (119667), Pumpkin Pie (105216), Old Olive (102277)

Accessories and More:  Big Shot (113439), Adorning Accents Edgelits Dies (125595), Word Window Punch (119857), 1-3/8" Circle Punch (119860), Crop-a-dile (108362), Basic Pearls (119247), Paper Snips (103579), Stampin Dimensionals (104430), Raffia and Minin Flower Pot.

Instruction on how to create the flower pot gift holder:

Step one:  Fold your 3-1/2" x 11" Natural Ivory card stock in half.  Place the Adorning Accents die at the top of the open end of the card stock and run through the Big Shot.


 Your card stock will now have a nice rounded edge.


2.  Centering the 1-3/8" punch at the bottom of the folded end of the Naturals Ivory card stock, punch out a half circle. (if you have a old style black punch line up your card stock to the black line, this is half way)


 3.  Center the Word Window punch at the bottom of the folded end, over top of the punched out half circle.  Punch out the word window shape. (if you have an older style black punch, go in as far as the punch will go)


If you have a newer style Word Window punch the distance from the bottom to the punched out word window shape is approximately 1-5/16" as shown here. 


4.  Place a Sticky note just below the punched out word window shape.  Ink up the Stem/leaves stamp in Old Olive and stamp on the Natural Ivory card stock. (the sticky note will block the bottom bit of the stem).  Repeat this step so you have 2 flower stems. --Flip your card stock over and repeat the above steps so you have the stem/leaves on the back of your project as well.


5.  With the 3/16" setting on the Crop-a-dile punch a hole approximately 1/2" in from each side (aprx. 1-3/4" up from the bottom)

 6. Ink your solid flower stamp in Pumpkin Pie and stamp onto a scrap piece of Natural Ivory card stock.  With Paper snips cut out flower. Repeat this step to create 2 pumpkin pie flowers.  Now repeat this step with Daffodil ink to create 2 more flowers for a total of 4.


 7. Ink up your greeting in Early Espresso ink and stamp greeting above the stems.  Add Pearls to your flowers if desired.  With Stampin Dimensionals attach 2 of the flowers to the stems on the front of the project. 


8. Using Raffia (or ribbon of your choice) loosely thread a few strains through one of the front holes making your way around the back of your project and ending back at the front. (where you will end up tying your bow)  Note: It's easier to thread the Raffia through the holes before placing the flower pot between the card stock.  Once the Raffia is threaded through the back just pull a bit of extra so you'll have room to open the card stock and place the flower pot at the bottom. 


 9.  Gently place the mini flower pot in the circle at the bottom of the card stock.  Add a flower bulb of your choice and then pull the strains of Raffia to close the card stock.  Make sure the top edges of the flower pot rest nicely in the word window slots.  Once the flower pot is nice and snug pull the raffia a bit tighter and tie a pretty bow.  Lastly attach the last 2 flowers to the back of the project with Stampin Dimensionals.


10.  Voila... you have a nice gift for someone special.  : )


Hope you like.. : )


My very popular Cupcake Punch Tutorial is Now Available!  Check out the top Right Hand side bar to purchase and receive your 45 page step by step tutorial.--Are you looking for new fresh ideas? Looking to be inspired? Look no further, I have put together a 7 part tutorial which includes 6 amazing cards and one stinkin' cute scrapbook page layout! The tutorial is in seven parts. Each tutorial gives step-by-step instructions with tons of photos to help you recreate each card. The complete tutorial is 45 pages long and includes over 100 photos. Four of the 6 cards have hidden greetings and i have incorporate the cupcake punch into all 6 cards! You'll be amazed at what you can do with the cupcake punch! I'm so excited to share this tutorial with you! : )

Wednesday, February 1, 2012

Gingham Background Technique {Tutorial}

Here's a card i created back in November but it didn't really snow here until a week or so ago! So we've been in the "snowball" mood for a couple weeks now!!

I believe the Gingham Background Technique was shown at 2011 Stampin' Up! Convention. I thought it was pretty neat and just had to give it a try!.

I don't know if you can see but i added a bit of glitter to the snowball using Dazzling Details. Also i used one of the textured impressions embossing designer frames!! You can earn these frames for FREE during Sale-A-Bration. ---ohhh you can also earn the Stripes Embossing folder for FREE as well!! wooohooo.. click here to find out how! ; )

If you haven't given this technique a try yet...here's how:

Step 1:
Ink the Stripes embossing folder with a brayer (on the side with the Stampin' Up! logo on it) and place a piece of 4" x 4" card stock on the clean side. If you place it on the inked side it may shift and smudge your paper. Make sure you ink up the folder really really well if you want a darker impression.


Step 2:
Close the folder and run it through the big shot.


Your card stock will now be coloured and embossed with stripes.


Step 3:
Once again, re-ink the embossing folder really really well and turning the card stock 90 degrees place the card stock on the clean side of the folder with the colour stripes facing up. --Just follow the lines on your folder to get it straight.


Step 4:
Close the folder and emboss it again by running it through the big shot.

Ta-Da! You are ready to attached the Gingham Background to your project-- Do you LOVE IT?! ; )


Here's a card we did at stamp club in January. The background didn't come out as dark at the top so that is why I'm stressing that you ink up the brayer really really well.. ; )

It was fun to try out the new cherry embossing powder ...yum! Here's how to get the embossing powder to stick:

1. Ink up your Cherry Stamp with Markers
2. Stamp image on card stock and let dry. (make sure it's dry!!)
3. Once dry, cover the cherries and leaf with your versamark pen. (colours will smudge if the ink is not completely dry)
4. Pour Cherry Embossing Powder over top of the versamark and heat dry!
5. Voila.. you've added a nice cherry smell to your card! How amazing is that..?! ; )

Hope you like... : )

Products used for the the Cherry Card project:

Stamp Sets: Button Buddies (W122735,C122737), Teeny Tiny Wishes (115370)

Card Stock: Crumb Cake (120953), Cherry Cobbler (119685) Early Espresso (119686), Whisper White (100730)

Ink: Cherry Cobbler (119669), Early Espresso (119670)


Stampin Write Markers - Early Espresso (119680), Cherry Cobbler (119681), Old Olive (100079)

Accessories and More: Big Shot (113439), Stripes Textured Impression Embossing Folder (123128), 3/8" Lucky Limeade Ruffled Ribbon (122977), Ribbon from Everyday Enchantment Ribbon & Brad Pack (127279 - Exclusive SAB Product), Brayer (102395), Decorative Label (120907), Versamark Pen (100901), Stampin Dimensionals (104430), Mini Glue Dots (103683), Snail adhesive (104332)

--Don't forget if you order $60 (before shipping and taxes) or more through me between January 24th and February 29th 2012, not only will you receive a Fabulous FREE Sale-A-Bration product but you will also receive a Fabulous FREE card tutorial from me!! ; )

Here is a Testimonial from one of my customers:

Hi Natasha
What a great idea! I love all the cards in this tutorial and it is a great way to showcase SAB. These will also be really easy to adapt for other products. Thanks for sharing!

TO ORDER STAMPIN' UP! PRODUCTS ON-LINE 24/7, CLICK HERE

or click here to email me your order!

Monday, January 2, 2012

Stocking Builder Punch Pinwheel Card


Happy New Year!

I'm sad to see 2011 pass by but I'm super excited for 2012....the kids have new challenges to face and well there are always new surprises popping up in the stamping world. The New Year brings NEW stampin' products, projects and ideas.--Yay!! : )

Since the Builder Stocking punch is only available while quantities last i thought I'd show you another cute card using this versatile punch. I created a cute pinwheel card awhile back when the builder stocking punch first came out but never did share it with you all so i thought I'd create another one using some new stampin products that will be available to you very soon!! I used some new accessories from the Occasions mini which goes live January 4th! and I used some DSP and a decorative brad which you can earn for free starting January 24th!


To create the pinwheel i punched out 5 stockings from the Stocking builder punch and Everyday Enchantment DSP (SAB Mini). I slightly cut the side of the stockings and stacked them, then punched holes in the top and bottom with the crop-a-dile. To hold the pinwheel together i added a Pool Party flower punched out from the Boho Blossoms Punch and added a cute brad from the Everyday Enchantment Ribbon & Brad Pack (SAB Mini) for the middle.

I also placed each end of the Naturals Ivory greeting banner in the full heart punch to neatly finish off the ends.

It's not to late to order the stocking punch!! --we haven't be notified that it is sold out yet!! Get it while it lasts! The item number for the punch is #120495 and it is $22.95. You can order it through me, or through my SU! website, HERE.

Tomorrow (January 3rd) is the last day to purchase the Stitched Stockings matching stamp set. Check out page 34 of the Holiday Mini Catalog.


Clear mount item number is #123784 and is $25.95.
The wood mount item # is 123782 and is $33.95.

Also don't forget to check out the clearance rack for some GREAT deals --up to 80% off... you have until January 5th to purchase these great deals.


Hope you like... : )

Products used for this project:

Stamp Sets: Bordering On Romance (Occasions Mini-W125480,C125482), Teeny Tiny Wishes (115370)

Card Stock: Pool Party (122924), Soft Suede (115318), Crumb Cake (120953), Naturals Ivory (101849)

Ink: Pool Party (122938), Early Espresso (119670)

Accessories and More: Big Shot (113439), Adorning Accents Edgelits Dies (Occasions Mini-125595), Stocking Builder Punch (While quantities last-124095), Full Heart Punch (119883), Crop-a-dile (108362), Craft Scissors (108360), Everyday Enchantment DSP and Brads (Exclusive SAB Products), Blushing Bride 3/8" Pleated Satin Ribbon (Occasions Mini -125570), Multipurpose Liquid Glue (110755), Cutter Kit (106958-distresser), Stampin Dimensionals (104430), Mini Glue Dots (103683), Snail adhesive (104332)

TO ORDER STAMPIN' UP! PRODUCTS ON-LINE 24/7, CLICK HERE

or click here to email me your order!

Monday, November 28, 2011

French Foliage club card {Tutorial}

It's been a busy couple weeks around here! I hope everyone is enjoying there holiday crafting. I can't wait to start my holiday gift making and baking this friday.. : )

Today i thought i'd show you a card we created at September's Club/Class get together. Some club members who missed the class had a few questions about how this card was created. Most were curious about the images inside the inked block image.

I do apologize, I created this card back in August and for the life of me can't remember who i cased it from.... : (

I remember the original card having a real button but i wanted to show my club girls how to create a "fake" paper button!! To create the button i used the button sizzlet and cut out 4 of the same button and glued them all together to create the thickness of a real button. (you can add more layers or less depending on how thick you want your button to look) You can also apply crystal effects to the top of the button to give a shiny look but i didn't do this for club as it would take to long (probably a few hours) to dry..!


To create the images inside the clear block image I used a clear block masking technique. Here's a quick step by step tutorial on how to keep your stamped images neatly inside the inked block image.

1. Ink up your clear block in More Mustard stamp pad.


2. Transfer the ink from the block onto your card stock.


3. Place stickie notes all around the edges of your stamped clear block image covering all spaces around the clear block image.


4. Start stamping your images inside the clear block image, over lapping on the stickie notes as the photo below shows.


5. Changing stamp images and ink colours continue to randomly stamp your images as you want them to appear inside the clear block image.


6. Remove all your stick notes.


7. Design your card as desired! I distressed the edges, attached the main card stock with the masking clear block technique on it to More Mustard card stock, added Early Espresso Bakers Twine, and a "fake" button and voila.. : )


Products used for this project:

Stamp Sets: French Foliage (W120845, C121166), Teeny Tiny Wishes (115370)

Card Stock: Early Espresso (119686), More Mustard (100946), Naturals Ivory (101849)

Ink: Early Espresso (119670), Cajun Craze (119671), More Mustard (103162)

Accessories and More: Big Shot (113439), Sweet Buttons Embosslits Dies (121813) Early Espresso Baker's Twine (123124), Cutter Kit (106958-Distresser), Snail Adhesive (104332), Mini Glue Dots (103683)


Hope you like..... : )

TO ORDER STAMPIN' UP! PRODUCTS ON-LINE 24/7, CLICK HERE